A letter to my forty-year-old self

When I was twenty, I wrote a letter to my thirty-year-old self. It went something along the lines of: Did you go to all the continents by your thirtieth birthday? Are you a physicians assistant? Do you have a ridgeback dog? And so on…

When I turned thirty, I wrote a letter to my twenty year old self. In a nutshell, my life turned out much, much differently than planned (other than having the ridgeback doggie, he’s still here!). My twenties were a roller coaster of up and downs–highs and lows–really high highs, but also really low lows—like deep, dark depressions, life let-downs, and well, learning that I had what is called pure-O OCD (basically disturbing, repetitive thoughts) that created a paralyzing anxiety since I was young teenager, and turned into a complete, all-out nightmare by my mid twenties. The more scary the anxiety became, the harder it was to address.

But, the highs of my twenties–meeting my husband, having my beautiful daughters, realizing graphic design was a career worth pursuing, and running a 50K through New Mexican mountain tops–these moments kept me trying, kept me moving forward–with the knowledge that happiness is a collection of moments, and these moments are what makes life the beautiful adventure it is.

And my kids? They made me realize that I owed it to them and myself to take care of my mental health–through facing that big ol’ bull right in the face and seeking the proper help and knowledge and not stopping (still not stopping!) to address that f***er.

The struggles and uncertainties have shaped me, and I am so grateful for my life–the ups, and the downs. It seems like the more we go through, the more we experience–the more, in turn, we have to teach and to give. So, just for fun, here’s a letter to forty-year-old me.

Dear Brenda,

Forty! Remember when forty was like, AHHG YOU’RE SO FUCKING OLD! While, ha! You’re there, so get over it! I bet you’re still sexy as hell. How are you? Okay, skip that–how are your kids? I can only image your young teenagers are smart, beautiful, and perhaps, a constant source of worry? Enjoy those teenagers! Remember how much work babies were? You are out of that stage! And you get to see them become little adults–wow, what an adventure. Does Daphne still draw the best in her class? Is Donna still an all-out comedian? Did Eli ever learn how to say agua in English? Did you ever learn patience? Ha! Are you having fun with Ian? Let me guess, he just got hotter–men, they do that–especially when they play guitar <if this was a handwritten letter, a drop of drool would be here>. I hope your love for him is stronger than ever. I hope your love for the kids is stronger than ever. And, I hope the love for you is stronger than ever–and if not, well, I hope life’s not over yet so keep trying!

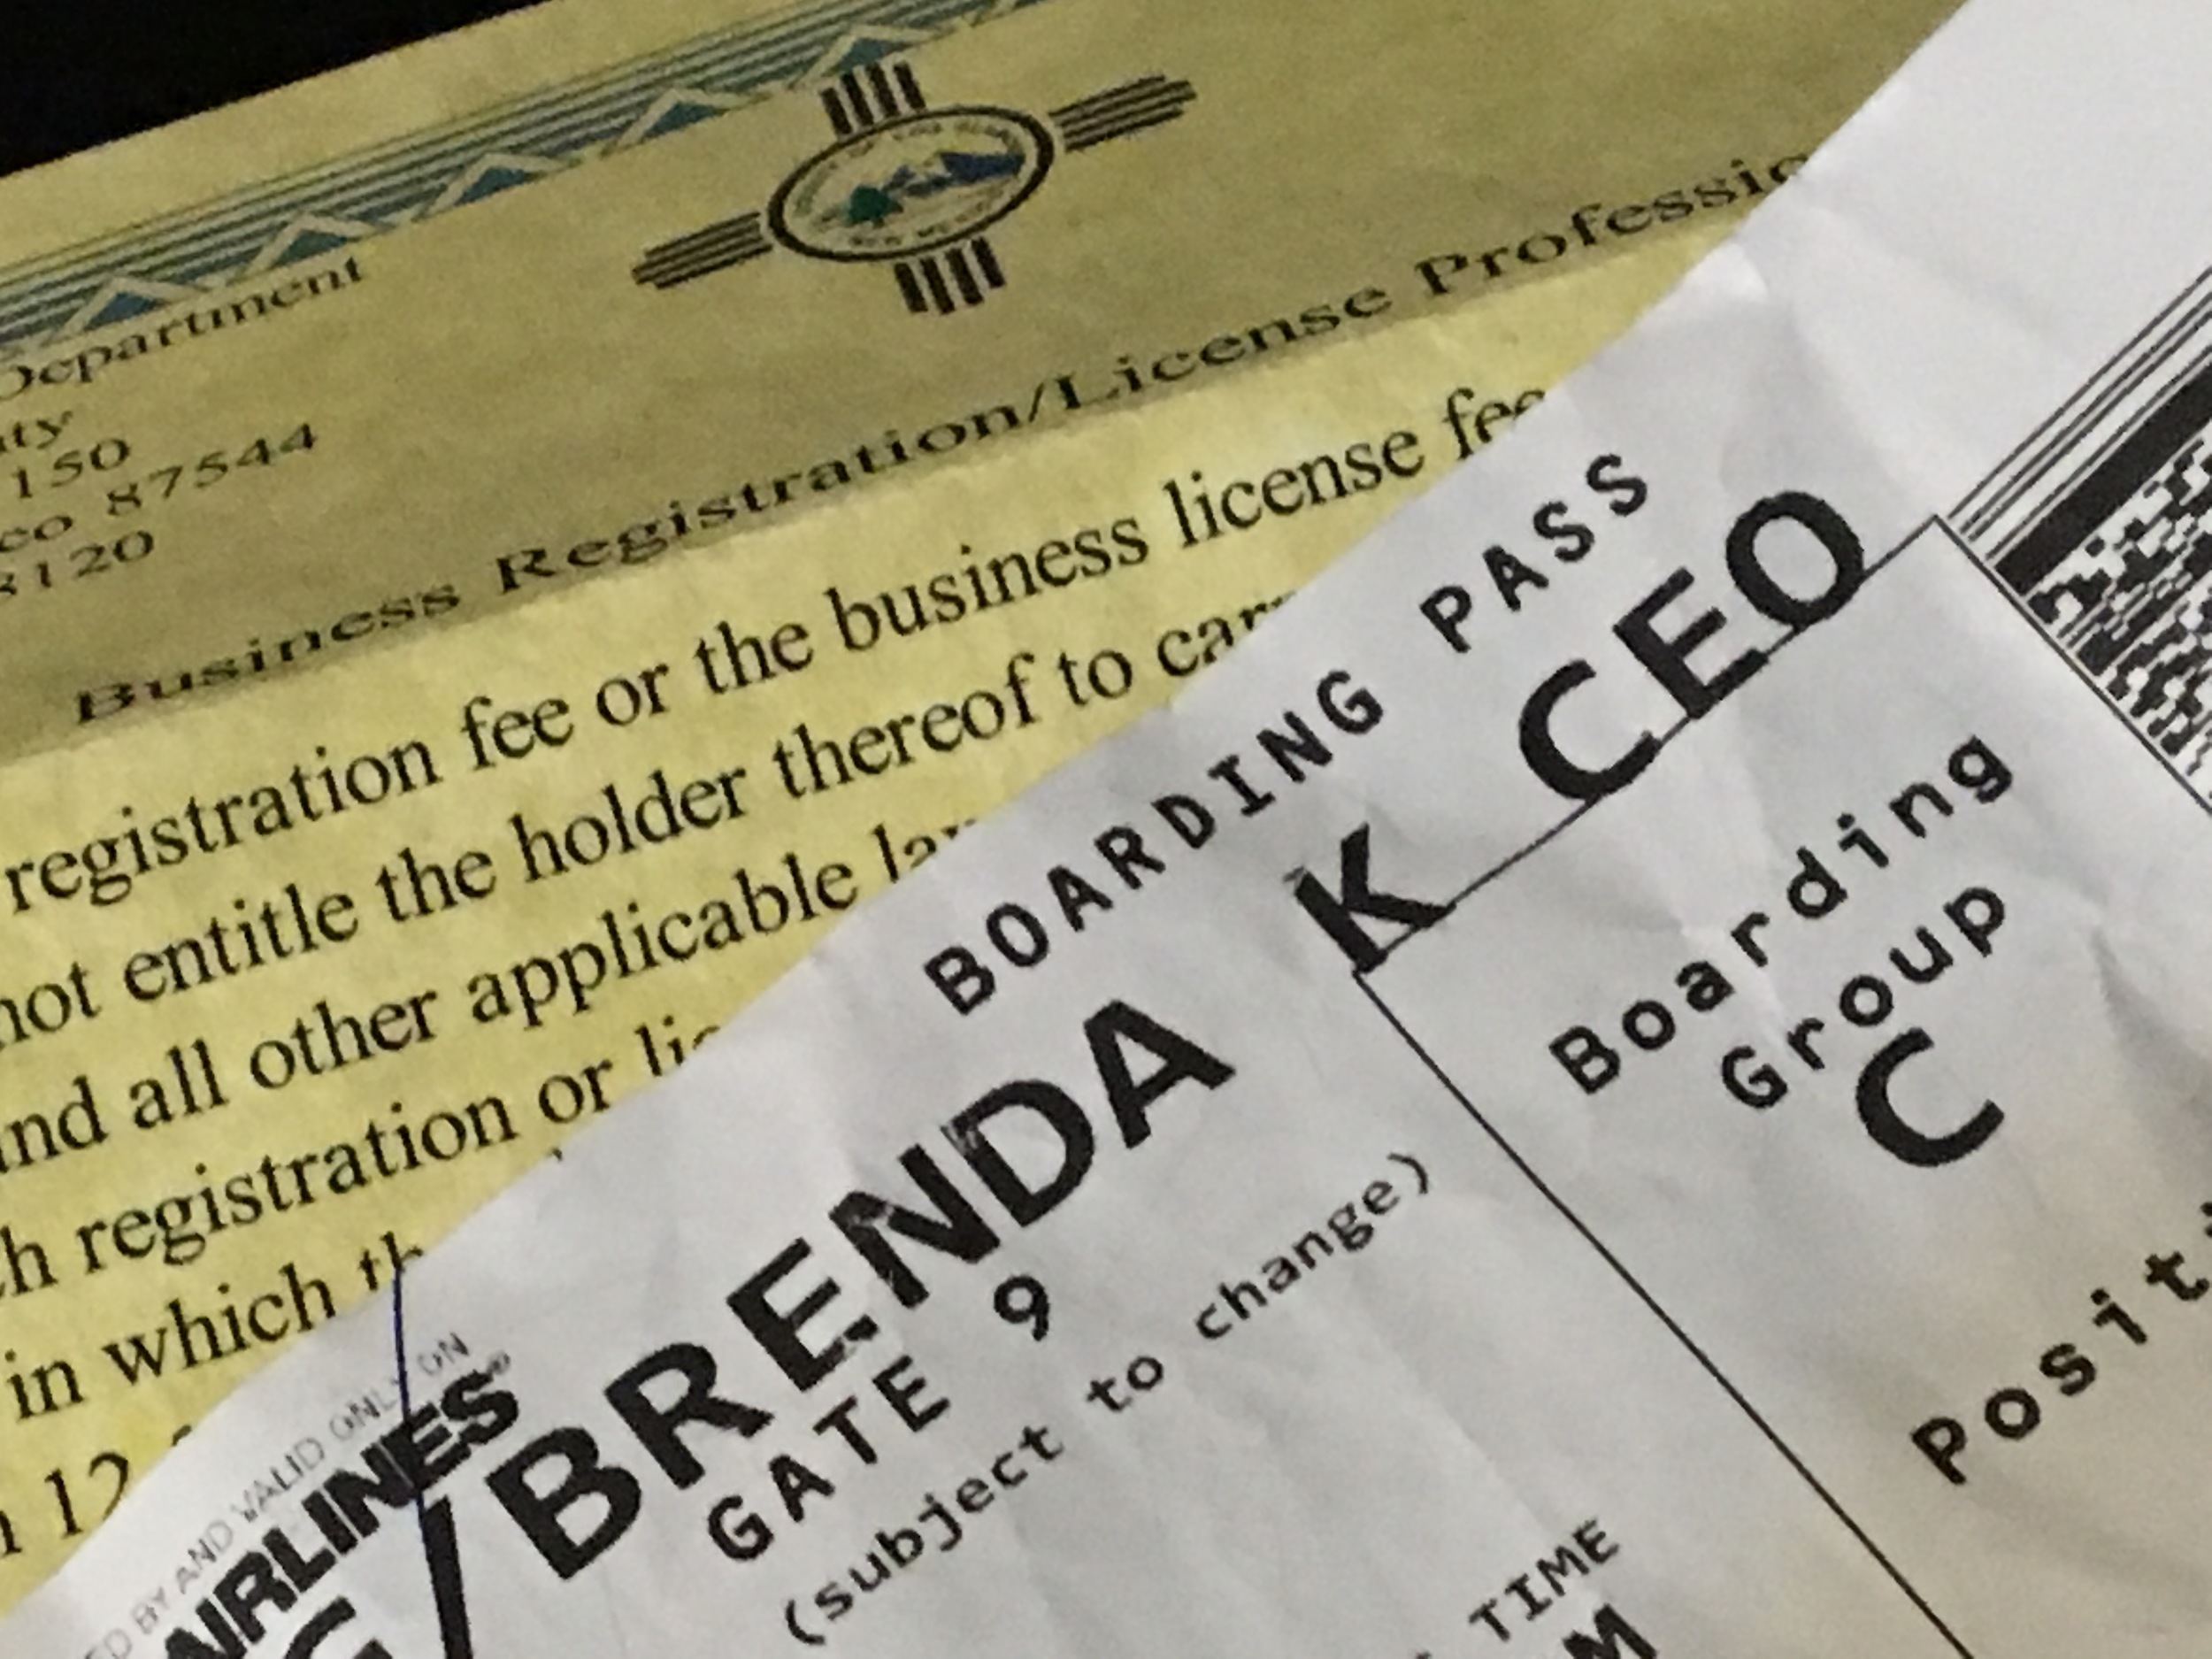
As I write this, I just turned 33. We’re in the midst of a pandemic, and well, you’ve had quite a few meltdowns while trying to balance work and kids with the stay at home order. Pandemic or not, let’s be honest–sometimes you just freak out, or get super upset, or impatient–are you still like that? Do you still worry about things at work, get frustrated with people, and obsess over saying the right things? Were you ever be able to purely set your focus on what matters? Were you able to answer what “what matters” is? Oh, and, um, are you still trying to lose weight? Did you ever get better at being a mom and doing mom-things like remembering to pack snacks and make the kids brush their teeth? Please tell me Donna still has teeth.

Future me, answer this: does time fix those obvious self-flaws that I see unfold in front of me, but just can’t seem to control? Or, are these things just part of who you are, and you’ll be working on them–or accepting them–until you die?

We just went camping in our dinky tear drop in Carson National Forest, and celebrated fathers day with a poster letter to dad that had words spelled out in candy bars. You helped the girls make dad ‘breakfast-in-sleeping bag’, and Daphne laughed hysterically when Eli insisted on helping crack the eggs–which he confidently cracked right on the picnic table, then placed the two halves of the shell into the mixing bowl. We dumped the first set of batter–at the request of Daphne–because she informed me that both her and Eli sneezed into the batter. The first pancake wasn’t so good–we fed it to Eli–the second one folded as Daphne tried to flip it. The third try Daphne successfully flipped that giant, slightly burnt pancake, while Donna sleepily gathered flower to put on the plates. They paraded to the camper and proudly gave dad breakfast. The weekend was filled with moments so precious–Donna made you the “perfect” coffee out of Nescafe using the camp stove and kettle all by herself, Daphne sang with Phoebe enthusiastically around the fire, and you relit a candle for Eli about forty times just so he could blow it out. You got to read your book and listen to Ian play guitar.

You get to cuddle with those kids, help them with their problems, and though you are always, always tired–there is always a reason to smile. I mean just last night Daphne was looking for coloring pages on the internet. She was like, “oh mom, that one says a bad word!” I leaned over and saw an -adult- coloring page that said, ‘You Fucking Got This'.’ She continued, “At least it says it in a positive way!” and then quietly, slightly smiling she said to herself “you fucking got this.” I was like whoa, what? We both were laughing–and thank goodness, she didn’t want to repeat it. Its moments like these that leave me just laughing, and proud that my daughter has a sense for bad words better than my own–(earlier she asked me to not be so “explicit” when I said the word dang-it. It took her a few times to pronounce explicit..). but she also has a sense of humor, and is just a solid person, it makes me proud that she is someone that anyone would just want to hang out with to make those moments that threaded together make up life.

So as I think about the next decade of life, where will you be? Will you do all the things 40’s promises your younger self? Pay off your house? Have more time to date Ian? Go to soccer games or music concerts? Be able to travel more? Maybe get a promotion? Not have any more diapers to change?

Here’s some thoughts from a younger, stupider self (because everyone wants advice from that person!) I hope you look back on this time with love, and not just remember the hard parts of raising kids, and working, and dealing with every little trial. I hope the future brings you a sense of peace, that you can finally become like a laid-back turtle that just enjoys sitting in one place and get total satisfaction from just watching the sun move in and out of clouds. I hope you continue to just love, really love and embrace the people in your life. I hope you remember what your grandma told you when she was 89–relationships are the only thing that matter in life. I hope if life gives you lemons, you zest that shit and make yourself one hell of a cocktail. But whatever happens, whatever turns your road takes–you just remember, you fuckin’ got this.

Love,

Your younger self, Brenda

June 23, 2020

IMG_3693.jpg

Buying a fixer upper for short term rentals? 11 reasons to consider before buying anything!

I mean, who wouldn’t want to go here?

I mean, who wouldn’t want to go here?

What I learned from buying a second-home-fixer-upper to use as a VRBO

In summary, don’t do it.

My husband and I bought a fixer upper home, gutted it top to bottom, and got it VRBO-ready within a year. Once on the VRBO website (which stands fro Vacation Rental by Owner), the home rented out every single day during the summer season. This place was a super spunky AFrame on a stunning, lake-front lot–only thirty minutes one direction to train-loving, southwest paradise Durango, Colorado and thirty minutes in the other direction to hot spring's mecca, Pagosa Sprins.

We found our place for $165k. You literally could sit on the deck and watch the moon rise over the lake, listen to the wind pushing small waves onto the red rocky shore, or hope out your front door, grab a paddle board, and be in what I think of a pure heaven. The mountains were gorgeous, the lake was an L shape and if you kayaked to the North, incredible snow capped 14,000 foot peaks would come into view. There was tiny grocery store, and a couple restaurants away but the feeling was remote, and the smells of pine seductive.

We had no idea how to get a second home, or if we could afford one. I figured we were doing pretty well with the first home we bought, rationed that “hey, if we were in the Bay Area, these homes combined wouldn’t reach the mortgage we would have to pay there!” There was red flags, the septic had to be updated and we heard that was around 20K. The place was ugly inside—filled with brown carpet and paneling—but the visions of potential was growing and twisting with my emotional connection to the view.

The guy who was selling it by owner didn’t exactly strike me as the honest type (The septics fine—its been like that thirty years, just dont touch it,” and “ you can tie a boat right up there".” Later we found out it was common knowledge that the lake and land in front of the lake, was Tribal land and national forest. No boat could be tied anywhere to preserve the beauty of the land. But, we got a deal of an inspection (only $350, you sure?!) and it came back as pretty okay! So we went for it.

I’m gonna go ahead and skip what happened next—the part where we bought it, closed, and basically discovered everything had to be redone. Not just painting walls and getting a 20k septic, but everything. The electrical was so outdated—the electrician was surprised the place hadn’t burned down. When we started running propane, it constantly smelled like propane, and the Propane guy refused to fill it (as he should!) until we had new connections, and a new stove, which lead to discovering the need for a new water heater, and new furnace. Every time we came, there was a water line busted, and we ended up having to replace all the pipes . The plumber we called noticed the sewage lines were had major leaks—and I’m not talking just gray water here. On Mothers day, I went to see the current septic system, if anything traveling did make it through the leaks. Buried under a bunch of sticks and old window panes, I found the :septic system:” 3 foot deep hole. That hole-in-the-ground was not only ethically wrong, but no way was it going to handle a summer of renters. It, and all the plumbing going to it, had to be redone immediately.

Just a fun lil’ picture of under the house. If you zoom in, the shitter pipe isn’t fully connected at the corners… :|

Just a fun lil’ picture of under the house. If you zoom in, the shitter pipe isn’t fully connected at the corners… :|

Back to the inside of home, it looked clean when we bought it, but we found the cabinets where completely filled with old medications, or rusted pots—I swept up 13 cigarettes in the kitchen alone. We took 9 trips to the dump one day (45 minutes away) to empty out the shed that seemed somewhat clean when we bought it, but completely packed). The carpet, walls and everything in between smelled like smokers. The house was on a hill, and the deck was about 15 feet in the air—the foundation for the for the deck? Nonexistent. Literally, one post was floating two inches off the ground, another was sitting on a brick. These posts were also the foundation for the house. The list went on.. and on..

I like the painting, tiling and flooring, but that was a small part of a major problem. By the time we got this place livable, it was renting like crazy on VRBO. We had done it! But, everytime we drove up (4 hours from our home) we started to dread what was wrong, what had broken. Everytime we had a renter, we started to worry about what could happen to them and would they fall off the deck or trip going down to the lake or, which actually happened, have two bears come through the kitchen window (luckily, the renters took that lightly!) It was a major, major source of stress. We had small children, and it took so much time from them (although, they did love the place!).

  1. Is the place within an hour or two of your home? If not, don’t expect to go there a lot, unless you have a lot of time on your hands and like the journey!

  2. Was the place well-inspected and in great condition? Basic inspections seem to only be surface inspections–get specialists for septics, termites, etc. Know what you’re getting into and the costs associated with that… but also make sure if those costs double, or triple or more–its not gonna kill you financially.

  3. If the place is remote, it probably doesn’t have sewage, or electrical, internet, cell phone service or trash pickup –all things you need to think about. Is there anyone who can manage the VRBO while you are away? A handyman in case something happens? A cleaner you can hire? We had a construction worker not only steal from us but was clearly squatting at the place with his girlfriend in the winter (sheets were messed up, and two whiskey glasses left out)–we couldn’t confront them because, well he was the ONLY one who actually did decent work!

  4. I get the draw to wanting magical place you return to, year after year, but we basically can go to any VRBO we want anytime as much as we want and it is still cheaper.

  5. Maybe you’re telling yourself you can sell it make money on it. You won’t. We spent 50k, and about 30 back-breaking weekends there and three very stressful years later we were happy to have only lost 10k... But very sad that we spent so much time on something that ultimately was totally stressful, and took so much time from our kids.

  6. Do you have kids? We bought this with the idea that this was for them–but really it just took a LOT of time away from them. Back to point 4–just book a place where everything is maintained for you–even the cleaning!

  7. Do you mind managing 24/7? We had a “manager”–and she was AWESOME. But every time I got a message from her, my heart spun into full on anxiety mode–did something happen? (Yes, two cub bears came through the tiny window while the renters were sleeping. Yes, the sink that you paid to get fixed fell on a drunk lady who was hanging off it and she wants all her medical bills paid for. Yes, the renters couldn’t fit their giant truck in the parking space and the neighbors asked them to move–okay! Me–Lets refund them a night so we get a 5 star review (later I found out they literally parked in the middle of the street so of course the neighbors couldn’t get through!) Basically, with a manager, you will still be the owner, and responsible for everything.

  8. Don’t do it.

  9. Don’t do it.

  10. Don’t do it.

  11. Do you have a lot of cash? Are you retired (or just loaded, like our neighbors who made it big in recent Colorado-friendly industries?) Then, well good luck.

So, what happened? We put the cabin on the market on the market, found out cabins in remote areas can take years to sell despite being so close to great towns, and took what we could get after 8 anxious months on the market! We are SO glad that we did. We totally enjoy having disposable income, no stressful phone calls and used a summer’s rental income to get an absolutely no maintenance travel trailer to make memories in!

So tell me, anyone make a similar mistake, or about to? xo

Dia de Los Muertos Pumpkin

Our glowing pumpkin :)

Our glowing pumpkin :)

I love this pumpkin. This was one of those human ingenuity moments that resulted from necessity: the necessity to not carve a pumpkin due to baby in one arm. Also, I had a super cool white pumpkin since the store ran out of orange ones, so I wanted to do something different.

How to achieve these results? I used the white pumpkin, a black sharpie to draw the face, and black-light face paint to accentuate the face. Then, stuck thing under a black light. I also tacked on some glow-in-the-dark spider webs as hair. Again, baby was in one arm–so I spent about ten minute free-handing this–hopefully you can take it further!

How to create impact as a graphic designer

I am going to keep this post short and sweet. To create impact as a designer, the answer is simple: know your audience. KNOW YOUR AUDIENCE. This is different from "I think my audience would like this." Nope. That is what you think, not what you know. The way you truly know your audience is ask them! 

I recently was the graphic designer for an employee giving campaign. I sent out a small survey using survey monkey to only fourteen employees to test their knowledge of the campaign. Most of them didn't even know the basics of the campaign–such as that they could donate to ANY nonprofit and that the lab matched a portion, or even that the campaign existed. 

Even thought this was a small sample, it significantly impacted design decisions. (Studies show testing only testing 5 people can give you dramatic results–so don’t think you need a massive budget for focus groups to get good info!)

The end result: We increased last years giving from 2.2 million to 3 million.

There were a lot of factors in this increase that also influenced people to give–a new giving tool, a new project manager on the campaign–an all out effort was made by everyone. Enthusiasm and change from how things had always been done? Yes, incredibly effective–thus, results achieved.

The project was also a finalist in the 2018 Adobe Government Awards. 

In conclusion, by knowing what the audience didn't know, we could work our campaign to truly target the audience. How we did it? You can read more about the campaign here.  

f9ab1664692751.5aea119c7012b.jpg

How to create an epic senior photo

My brother's pride and joy: being his team's water boy after breaking his collar bone... twice.&nbsp;

My brother's pride and joy: being his team's water boy after breaking his collar bone... twice. 

An epic photo starts with a little personality, a lot of natural lighting and a good camera lens. Okay, an iPhone was used to take the above picture. And of course I didn't photoshop that! ;)

I use this Canon lens for nearly all my portraits.

For my little brother Joey, I took him to our ski hill and photographed him with about five different backgrounds using natural lighting but no direct sunlight. Each of these photos was taken during the middle of the day but in the shade (to eliminate over exposure).

I researched poses ahead of time so I could tell him how to stand, sit, and so forth. 

And of course, he brought his own pose ideas...

Deer and Bear Pallet Art

To create the deer pallet art, take apart a pallet with a hammer and trim the boards to create a pallet canvas  that is 15.5" by 20". Wood-glue them to a backing, (which, in my case, was just two pieces of scrap wood that span perpendicularly across the pallets).  

Without scaling down or selecting "fit to page" while printing, download this deer stencil and print on eight 8.5 by 11 sheets of paper. Then, put together the each deer as if it were a four piece puzzle. There will be tiny white gaps where the printer couldn't print between the pages, just draw or visualize the line extending to the edge of the page (rather then cut off the edge).  Tape the pieces of paper together. Cut out the deer shapes to create a stencil (note: exterior lines of the deer stencil show edge of pallet canvas). Hold the stencil in place and carefully trace around it using a colored pencil close to the color of your paint. Paint within the lines. 

For the bear, create a 12" by 12" pallet canvas, download bear stencil, print the stencil on two 8.5" by 11" sheets, tape, cut, trace, and paint outside the lines to get a similar result. 

Use a grid when painting from a picture

Original photo of a buffalo I took in Saint Ignatius, Montana. For my painting,&nbsp;I cropped it and reflected in photoshop, and created a grid to help me get the correct proportions of the buffalo.&nbsp;

Original photo of a buffalo I took in Saint Ignatius, Montana. For my painting, I cropped it and reflected in photoshop, and created a grid to help me get the correct proportions of the buffalo. 

I had the opportunity to go to a buffalo conservation in Montana. I took photos of amazing animals–buffalo, sheep, elk, deer–all in their natural habitat. Naturally, I went home wanting to paint a picture of a buffalo. My mom gave me a black canvas to paint, and I sketched out the outline of a buffalo from a picture I had taken. The buffalo looked more like a pig.

After some convincing, I finally gave in to my mom's tips on making a grid, and sketching the buffalo piece by piece. The results? A buffalo that looked like a buffalo. To do this, divide your picture into a grid, and enlarge that grid on your canvas. Draw out each section of the grid (rather than the entire picture). This will ensure accuracy in proportions. The smaller your grid increments, the more accurate the drawing. Once you have your photo in sketch form, then start painting in the colors and the details. 

It is much easier to draw the shape within a box on the grid then trying to draw an entire buffalo body. Buffalo shapes are really unique.&nbsp;

It is much easier to draw the shape within a box on the grid then trying to draw an entire buffalo body. Buffalo shapes are really unique. 

Designing anniversary and My Little Pony cakes

Here are the cakes I recently designed and created. My sister baked the cake for the 50th Anniversary ones, and with the leftover we made the my little point cake for my niece's birthday - and I did the frosting, filling and decorating. My advice for designing cake is be sure you can visualize it first. If it's a big job, sketch it all out first. I won't go into the details, but I'm posting some of my favorite recipes this summer for cakes. I'll also post my favorite summer dessert recipes. I'm basically just making a list of favs... before I forget them. :P

Enjoy!

Super Easy Vanilla Buttercream (used in both cakes)

Soften 4 sticks butter in microwave until soft (maybe 10 - 20 seconds) but not melted at all. Put in mixer at medium speed until creamed (about a minute). Change to low speed and  7 cups powdered sugar on at a time until incorporated. Add 2 tablespoons vanilla, 1/4 salt and 4 tablespoons milk. Mix on medium-high for three minutes. Voila!

Super Easy Chocolate Mousse

  1. 1/3 cup hot water
  2. 1 cups semi-sweet chocolate chips
  3. 1.5 cups heavy cream
  4. 2 Tbsp sugar

Add Hot water to chocolate chips and melt in microwave for 30 seconds (stir) and then another thirty seconds. Repeat until chocolate is almost melted (don't over heat or won't work). Meanwhile Whip the cream and add sugar. Fold in chocolate. Chill. 

Vanilla Lemon Macarons

Filling:

In mixing bowl crewm 1/4 softened butter  + 1/4 cup cream cheese. Then add lemon juice to taste (maybe 1 tbs) + add powdered sugar until consistency of frosting.

Cookies:

- 2 egg whites

- 1/4 teaspoon vinilla

- 1/4 teaspoon cream of tartar

- 1/8 teaspoon salt

- 1/2 cup sugar

- 1 tablespoon cornstarch

(This below recipe is copied from: http://www.recipe.com/lemon-meringue-sandwich-cookies/ )

  • In a medium bowl allow egg whites to stand at room temperature for 30 minutes. Preheat oven to 300 degrees F. Line two large cookie sheets with parchment paper; set aside.

    2.  

    Add vanilla, cream of tartar, and salt to egg whites. Beat with an electric mixer on medium to high speed until soft peaks form (tips curl). In a small bowl combine sugar and cornstarch. Gradually add the sugar mixture to the egg white mixture, about 1 tablespoon at a time, beating on high speed until stiff peaks form (tips stand straight). Fold in lemon peel.

  • 3.  

    Transfer egg white mixture to a disposable piping bag fitted with a large round tip. Pipe 1- 1/2-inch circles that are between 1/4 and 1/2 inch thick onto the prepared cookie sheets, leaving 1 inch between circles.

    4.  

    Place cookie sheets on separate oven racks; bake for 10 minutes. Turn off oven; let cookies dry in oven with door closed for 1 hour. Carefully lift cookies off parchment paper. Transfer to wire racks; let stand just until cookies are cool. (The cookies can quickly become tacky, especially if the weather is humid. To prevent this, store unfilled cookies in an airtight container at room temperature for up to 3 days.)

    5.  

    Just before serving, placeLemon Filling in a piping bag fitted with a large round tip or in a resealable plastic bag with a corner snipped off. Pipe 1 teaspoon filling onto the flat side of half the cooled cookies. Top with remaining cookies, flat sides down, to make sandwich cookies. Makes about 34 sandwich cookies (2 sandwich cookies each).

Summer Rum and Berry Trifle

Stack Vegan Vanilla Cake (see recipe below) with whip cream, fresh berries and spiced rum.

Extra info : The vegan cake is denser so it soaks up the rum without getting mushy - I discovered this when I didn't have eggs one day... I actually used regular milk... and cream on top so this is not vegan!! And I also had loads of spiced rum due to Christmas cocktail  party leftovers... This turned out so good though I've already made it again!

Cake modified from http://lovingitvegan.com/vegan-vanilla-cake/

INGREDIENTS

  • 1 and ¾ cups (220g) All-Purpose Flour
  • 1 cup (200g) Sugar
  • 1 tsp Baking Soda
  • ½ tsp Salt
  • 1 cup (240ml) Milk (or non dairy if ya wanna go vegan!)
  • 2 tsp (10ml) Vanilla Extract
  • ⅓ cup (80ml) Olive Oil
  • 1 Tbsp (15ml) White Vinegar
  1. Preheat the oven to 350 degrees Fahrenheit (180 degrees celsius)
  2. Sift the flour into a mixing bowl.
  3. Add the sugar, baking soda and salt and mix together.
  4. Add the soy milk, vanilla, olive oil and vinegar and whisk it in.
  5. Grease two 7 inch round cake tins with coconut oil and divide the mixture evenly between them.
  6. Bake for 30 minutes.
  7. Remove from the oven and using a toothpick, insert into the center of the cake. If it comes out clean then your cake is done.
  8. Move to a cooling rack to cool completely.

How to get people to look at your website

Congratulations, your website looks spectacular!

But how do you get more people to visit the site, stay long enough to get interested in buying your product, come back and tell others?

Collect visitors’ contact information and follow up.

In most cases, you won’t be able to make a sale the first time someone visits your site. Accept it. But that doesn’t mean they won’t become your customers later.

Make sure that you collect their information right away. How?

You give them something in return for their email address. In most cases it is information. A free report or download with a title that intrigues your target audience. They need to find the information valuable enough to give you their email address.

Then what?

Follow up with an autoresponder series

Email management programs like Constant Contact and Mail Chimp let you create a series of emails that can be automatically sent to people when they sign up for your list. That way you can follow up with new subscribers, establish rapport, and send them back to your sales page without having to individually email each person.

An autoresponder series can look like this:

Email 1: Welcoming the person to the list and delivering the promised piece of information.

Email 2: Personally inviting the person to join a facebook group or like a page.

Email 3: Tell a story about how a client solved a problem or overcame an obstacle using our services.

Email 4: Showing the person a link where they can access your blog archives.

Email 5: Providing answers to common questions.

You get the idea. Each email reminds the person that you exist and gives them a chance to think about buying from you.

Add content on a regular basis

Adding new pages to your site is one of the best ways to improve your search engine ranking, and give you something of substance to share on your social media networks. You can add new pages, or simply add a blog to your site.

But what should you write about?

  • For every question that your customers have, dedicate a page to answering it.
  • Create some pages showing how you do different parts of your job.
  • Write a page about yourself, your interests and your quirks.
  • Make a list of problems that your customers face, and write about how to solve those problems.
  • Write a success story about one of your customers.
  • Interview someone who has information that would interest your customers.

The sky’s the limit when it comes to content. Just think about what your customers want to learn about.

The way you present the online content makes a difference.

There are simple tricks that get people to more people to read your content.

Put your introductory paragraph in boldface print or in a larger font than the rest of the article. According to Conversion XL, when subjects in an online readership and eye tracking study encountered an article with a boldfaced introductory paragraph, 95% of them read all or part of the story.

Make the first sentence short. If something looks hard to read, people will avoid it. Often, website visitors skip over and completely ignore large chunks of text. All you have to do is break up your ideas into one or two sentence paragraphs.

Try placing your illustrations on the right side. People are more likely to pay attention to text, and they scan in an F pattern starting on the upper left hand of the page. It makes sense to have your headline be in the upper left hand of the page and the picture aligned to the right.

Having a beautiful website helps your business make a good impression and impacts people on a subconscious level. Content helps you keep people interested, follow up and make the sale. If you would like more ideas on how to come up with content for your website, visit www.mandymarksteiner.com to download a free copy of the “Blog Brainstormer” worksheet.


5 questions you must ask before hiring a logo designer

You have an amazing business idea and you’re ready to change the world, and make some money in the process.

But if you want to attract customers you need an identity that people will remember. Before you can make a website, manufacture products, design ads, or even print out business cards you need a logo to hold everything together.

Your logo is the face of you your company. It can visually reinforce your company’s values and has the power to forge a subconscious emotional bond with your customers.

When you’re getting started, your logo plays such a big role establishing a good relationship with your customers. You want to hire a graphic designer that can get it right the first time.

But it is up to you to give them the information they need to create a logo that will make the positive impact you need to make a profit. Before you contact a graphic designer, here are some questions you need to ask yourself:

1. What three words describe my company?

Think this over. Stay up all night thinking this over. Ask other people what they think about your idea and what they want to see in your business. Research how other successful companies describe themselves. After gathering all this feedback you want to boil it all down to three perfect words. Tell your designer what those words are.

Yes, you will end up telling your designer as much as possible about your company (how big it is, what your business goals are, everything).  But your logo needs to express one strong and concise message. What are those three words?

2. Who is my target audience?

A good graphic designer will create a logo that will appeal to your target market. Find out as much as you can about your target customer. Details like: How old are they? What kind of money do they want to spend? What other products do they love? Be prepared to give your designer this information. If your graphic designer doesn’t ask a lot of questions about your customers, take it as a bad sign.

3. Where will this logo be promoted?

Is it going to be on a tiny label, only online, or printed a silk tag sewn to each of your products? Is it going to be on an app? Printed on a fake brick (yes, I have seen that) or up on a billboard? If you have a storefront, will the sign be in neon, carved out of granite, or cut out of glossy sheet metal? Think of all these ideas, because your designer is going to create something that will work in context that you choose.

4. How can I tell if a designer is as good as they say they are?

Check out designers via their portfolio – do you like their style? Resume’s are an important way to show you their experience, but it’s more important to see proof that that they can design. Make sure you like what they have already done. Also, see if they have done work in your industry.

It’s simple: If you don’t like what’s in their portfolio, don’t hire them. If they don’t have a portfolio, certainly don’t hire them – you don’t want to be someone’s first project.

5. What is my budget?

Logos can cost anywhere between $5 and $50,000+. What should you spend?

I don’t want to spend a lot of time talking about the $5. If you spend $5, you are either paying someone to get it done in under a half hour, or you’re or you’re asking them to work for free.  A logo is an investment, and if you don’t invest in it, don’t expect a lot of return.

I’ve had several clients come to me after buying a $5 logo that looked like it was done in less than five minutes (it probably was!). They were happy to pay to get something they could be proud of.

Still, there’s a huge range in logo prices. How do you set a budget?

I charge between $1,200 and $2,200 for a logo. I meet with the client for a project interview, conduct research on the company, and create up to three good logo options and then give them three rounds of revisions. The fee gives me plenty of time to deliver my best work, and my customers are happy because they get what they want without having to redo anything later.

When you’re setting your budget consider how much you can afford to spend, and how much you are planning to make.

In the end, you need to respect the prices that the designers set. Shop around to find designers with a range of prices and ask yourself if the quality of their work justifies the price. Then hire the best designer that you can afford.

How to start a side business

According to a recent study, entrepreneurs who keep their day jobs are 33% more likely to succeed than those who take the "full plunge".* Starting a business on the side can enable you to test the waters of being a business owner, while not risking your finances or investing too much time.

Here are some steps I took to start my business on the side. In my case, I had two babies within one year (gasp!) so I did it 'on the side' of parenting. Now that I have more time and have been successful at a small scale, I am about to launch my business into a full time operation.

It can be really daunting to start a small business, but if you have the interest - I encourage you to give it a try! Before doing anything below, I suggest finding someone in your field who can act as a mentor. A goodfriend in town opened a massage business before I started - and her advice was so helpful (even though she was in a different field). I later met a business owner in my field who was about 10 years ahead of me, and she was a great resource to ask questions and advice.

Moving on, here's how I got started with little financial investment:

1. Made an appointment with the Los Alamos Business Center and applied for a business license and a Tax ID number. Try checking with you county of local chamber of commerce to figure out the legal paperwork to get started (business license, tax id number). I registered as an LLC. because that seemed to make the most sense liability wise. Sound confusing? Try to figure out who in your town helps small businesses grow, and then see if they offer free consulting to help you figure out how to start the basic license paperwork.

2. Opened bank account and open a bank account for my business. You want to keep checks from clients and money you spend completely separate from your personal stuff. This is really useful in figuring out how much income you made (and the taxes you need to pay on it) as well as how much you spent - and what you can deduct (which is A LOT of it).

3. Made an appointment with local accountant to figure out what taxes I need to pay. This was literally, the most daunting task. The first half hour was free, and I learned everything I need to know. I pay gross receipts twice a year online - which is super simple to do once you receive your tax id numbers and then I pay everything else during tax season via Schedule C on Turbo Tax. I ordered a DOME accounting book ($15?) and spent a couple hours figuring out how to use it. Once a month I open my bank statements and record deductible expenses, expenses and income (which is what I pay the gross receipts on). Not only does it prepare me for when taxes come around, it's a nice checkup to see if I am making or wasting money.

4. Emailed and researched local designers to see what they charge. A mentor in your field might be able to help you with this one. I had no idea what people charged for design. I emailed every designer I could find. Prices in my area went from $50 to $135 (usually the bottom price being $70, and marketers (that claim they can do graphic design) do it for less than that. A lot of people a product fee instead of hourly. Figure out what your expenses are and what you need to make to make sure your business doesn't go under. If you have high software costs, rent, daycare - whatever it is that is costing you money you need to make that back and then some. Or, what's the point? $60 sounded crazy high to me, but after taxes and expenses, its more like $15-$20 take home, which is proving to be fairly low. Currently, I am working towards developing a more product-based pricing.

4. Created a very basic contract and GOT DEPOSITS BEFORE WORK. Again - a mentor in your field, some online research, and/or a lawyer can help you figure out how to cover your butt. You need to decide ahead of time things like: time limits, revision limits, licensing and copy rights (your artwork? give them a limited usage right or crank up the price), you-don't-get-the files-if-you-don't-pay-me limits. You need to write down EVERYTHING you will deliver ahead of time, that way when a client asks for more, you can show them that that's not within the contract, and bill as needed. For designers, AIGA has great example proposals and contracts. Everything needs to be in writing, even if it's just in an email.

5. Met people and marketed myself. I emailed all the designers in town and met them. I am a big fan of collaboration, not competition when it comes to colleagues in town. I got to see what needs I could fill. I also did some pro bono projects (NOT DISCOUNTED, but free) that put me in front of eventual paying clients. I joined AIGA ($14/month) and met awesome mentors and people I could ask questions. I stay involved in my community, and make sure people know I exist. I made an online portfolio and this blog, and I constantly update it.

6.  Narrowed my focus. In the beginning I had time to work for a variety of clients and projects and now, I feel like I know what direction I want to pursue. I know my skills better. I want to be the best option for my clients and offer them design work that gives them results. I am figuring out what I can offer that is of high value to my client, and in return I can generate more income for my business. I learned to say no by nicely referring someone else. In design, it's best not to accept projects unless they lead to more projects or are good experience for your portfolio. Learn to say no to clients that aren't a good fit for you.

7. Continued my education. PODCASTS ARE AWESOME. I love Working Without Pants by Jake Jorgovan. He interviews loads of freelancers (while traveling across the world and working as a freelancer himself). I learned so much and was really inspired. I also am currently doing a Masters of Science at Arizona State University in Graphic Information Technology. I take classes at a snails pace (1 per semester usually) that way i have time to apply everything I learned. This obviously is not free, but there are loads of scholarships available.

8. Worked on my own self. It's important to be self aware and focused. I do several things to maintain the best version of myself like sleep and exercise. I also do self-checkups (did I take that too personally? Where is that person coming from?). Business success is a lot about learning to work well with many different people and personalities.

So that's it! Have you started a business? What was your process?

5 Reasons to Freelance

Okay, CEO is a stretch. But I am my own boss. :)

Okay, CEO is a stretch. But I am my own boss. :)

I just turned down an awesome full time position. By awesome, I mean consistent paycheck, wonderful co-workers and five minutes from my home. As a designer, there are three basic options for careers: freelance, work as an in-house designer or work for a design agency.

It was a difficult decision, but here is why I chose freelance: 

1. I get to choose what I work on (most of the time).  My passion is branding (logos, font pairing, color palettes). By freelancing, I can say no to projects that don't further me in my career. I have the opportunity to work with different businesses to expand my expertise in creating result-focused branding identities.

At first, Iworked for anyone who would pay me. But, as my business matures, I am starting to find my niche as a branding specialist. I want to stay focused, that way I can hone my skills and offer the best possible solutions to customers that need those focused services, ya know what I mean?

2. I get to choose my schedule. Choosing a schedule that works well with my family enables a happier and healthier lifestyle. I can work while my kids are in school and be available for them when they are home.

3. Harder work equals more pay. I am an extremely hard worker and very efficient. If I work for a salary, whether I am a good or bad worker means I get the same pay. Sure, I can get fired of promoted - but the payoff doesn't usually happen quickly. Freelancing, if I work to market myself and create amazing products that create results for my clients, they want to pay me, and continue to pay me!

Granted, if I slack off or no one wants to pay me - my business goes under. I gotta push myself to do really great work. That's a risk I'm worth taking because folks, this chick ain't no slacker.

4. Running a business is exciting. Some aspects aren't that glamorous - such as accounting and taxes - but it's fun to figure out. It's a big confidence booster knowing that I am in charge. Failure or success is in my hands. Muhahahaha! Hopefully I don't blow it... :)

5. I've worked as an in-house designer before. I totally value this experience. I had amazing managers that really challenged me. I loved it, but now I love going solo. Han Solo baby! There is no design agency in my town, so I've never had that experience but the but I try to replicate the benefit of an working with agency, which is working with other creatives, by meeting other designers whenever possible through AIGA events and coffee talks.

So - what's your position as a designer? In-house, Agency or Freelance? What are your likes and dislikes?


Homemade Letterpress and Embossed Cards

This is my latest project. My husband made the mistake of getting me a letterpress, die cutting and embossing kit (the evolution).  Above you can see the embossing on the envelope. The inked area is letterpress. This is the gateway to ultimate crafting. The coolest part? I can create for you custom letterpress plates. The plates cost about $30 to get created, and then I would charge you a separate design fee for the actual plate. This is an awesome way to fancy invitation, labels or any piece of paper you would like to give an authentic look.

Chocolate Lace Wrapped Pumpkin Cheese Cake and Pumpkin Shaped Bundt Cake

Chocolate Lace Pumpkin Cheesecake

A year or so ago I did a blog displaying aChocolate Lace Wrap I made using Julia Ushers tutorial - it was super minimal, and I realized people were searching for a template. So - as your thanksgiving present - I provided free for you a template to create your own pumpkin cheesecake chocolate lace wrapped thanksgiving indulgence of love. Your welcome.

What you need:

- Lace Pattern (Do not fit to page when printing)

- A nine inch pumpkin cheesecake (I created this one because of the nice flat top.)

- Godiva Chocolate melts or Chocolate chips

- Parchment Paper

- A long Board

- Gallon size plastic baggies

- Scissors

1. Cut out patter and tape together. Tape together to form a long strip, anddown to a long board (cardboard will work, I used a mini ironing board.) Place parchment paper on top - but have the bottom edge of parchment paper line just below the bottom edge of the pattern.

2. Melt chocolate in microwave according to directions (30 seconds, stir, repeat until you can stir the lumps out. Usually takes less then a minute and half). Spoon into plastic bag. Snip of a TINY bit of the edge so you can pipe a thin line out. Trace the pattern.

3. When finished, as soon as none of the chocolate is runny (but NOT hard!) wrap around the cake. Very carefully press it against the cake and the end edges together. You might have to use a little melted chocolate as glue to make those edges touch and stick.

5. Refrigerate until chocolate is hard. CAREFULLY move to table. The lace is very fragile! But once everyone sees your beautiful dessert - cut it open and enjoy!

Pumpkin Shaped Cake made with Bundt Cakes with homemade pulled sugar stem

What you need:

- Two bundt cakes, cooled

- Two cans of orange frosting

- Luster dust (makes it shiny/can get at hobby lobby, online, cake shop...) and sprinkles

- Red/Yellow Food coloring if you want to shade some of the frosting

-2cup sugar

- 2/3 Cup corn syrup (I use light corn syrup as it won't mess up the color)

- 4 tablespoons H20

- Few drops of food coloring (red in this case) and flavoring if you want it (cherry in this case)

- Thick Gloves (or several layers of thin ones

- Silpat or Parchment paper

Place both bundt cakes upside down. Using a bread knife, level the flat edges and save the extra cake. Frost the top of one bundt cake (usually the bottom) and place the other one on top to create a pumpkin shape. Use the excess cake from leveling to fill the center. Frost the cake. Create thick lines of frosting down the edges as in picture to create a pumpkin look. Add a bit of red to some of the frosting to add shading or different oranges colors to create a more organic look.

PULLED SUGAR CAN BE VERY HOT AND DANGEROUS - FIRST WATCH THIS VIDEO TO GET AN IDEA OF IT AND BE CAREFUL! Put sugar, corn syrup, water in pot and boil for ten minutes brushing edges with water until its starts turning gold. Poor CAREFULLY on silpat/parchment paper - allow to cool a bit. WEARING GLOVES, start pulling up edges. Add a bit of die Fold on itself, and gradually, once cool enough to pull up without sticking to your gloves, pull it up, fold on itself, pull and repeat until shiny. Once its cooled to the point where you can form it (within about a minute) twist a large chunk into a 5 inch stem shape. Twist smaller parts into vines. Cool completely.

Press stem into center of cake (like a candle). Add whatever vine like pieces around. Finish off with luster dust.

Hope you enjoyed this blog -- Enjoy!


Some very basic typography definitions and tips...

Quick definition: Typography is "the art and technique to make written language legible, readable and appealing"(Wikepedia). Selecting fonts, sizes, and spacing between lines (leading) and letters (kerning) can make all the difference to create a project thats easy to read as well as attractive. 

Ahh, typography - the art of making the beautiful written language, well, functional. The first thing to think about when working on the typography of the project is: What is the goal of this typography. THE GOAL.

The goal of typography is not always to look pretty. A pretty little sign with skinny letters that look like they were copied off a pumpkin spice latte Starbucks sign aren't going to grab your attention when you're looking for an emergency exit. You want to be rescued by the  big ol muscly EXIT sign letters, lit up with green and neon and glowing! Figure out what the GOAL is - if it is to grab attention - you want big, bold, unique - something that stands out. If you're goal is to focus on the content, e.g., the typography of a novel or a New York Times article, you don't the typography to take away from the content - so you might use something simple and plain, such as Times New Roman.

Here's some quick tips and definitions on typography:

How do you choose a font? Once you figure out the goal, explore different options. Adobe TypeKit offers a library with your subscription DaFont offers thousands of free fonts (although for commercial use you might need to pay a bit). Treat your project like it has a personality. If you want you're article to be loud and outgoing - choose a font for headings that reflects that. If your brochure on cancer to be professional and serious, sure as hell don't choose comic sans. 

How do you choose a size? Hierarchy, Hierarchy HIERARCHY! It took me years to learn to pronounce that damn word... If something is more important, make it bigger. Size, in this case, does matter. Bigger usually means 'read this first'.

What is leading? Space between the lines. Ever see a document that the lines are so close together that it makes you sick - yep, bad typography. To spacey that you lost your place? Those folks need to work on leading (space between the lines). You can usually eyeball this with practice, and if you don't know what looks good - use the auto function... But once you know the rules - break them!

What is kerning? Adjusting the space between the letters. Ever see a sign with awkward gaps between the letters and in the end your not totally sure what the sign says? ("Therapist will be with you shortly" is a lot less scarrier than "The rapist willbewith you shortly") Those peeps need to work on their kerning. My advice? You usually don't want to mess with the kerning. Font designers spent ages on creating the perfect spacing between their letters - chances are you aren't going to make it better. And again - once you know the rules - break them!


Okay - I have to admit when I was studying digital media arts there is so much focus on how to use software that some major design principles get swept away.  If you are new to designing, I highly recommend Robin Williams (not the funny one) book called "Non designer's design book" and make sure you apply is CRAP principles (Contrast, Repition, Alignment and Proximity). 

Contrast - Notice the differences between sizes and fonts. If you hardly notice the difference, don't make it. 

Repetition - Continue to use the same styling throughout the your project that way the user quickly recognizes what goes with what.

Alignment - Use a grid and columns - you want to put your words and paragraphs in a place for a purpose - i.e., it makes it easier to read in the order you intend. Left align lengthy paragraphs - again, easier to read. Don't forget people are lazy - even their eyes are lazy! So lazy that they want to know exactly where they are supposed to look next, so use alignment as your yellow brick road from paragraph to paragraph. 

Proximity - Figure out who and what belongs next to what. A paragraph that's drifted away from it's header - in a sea of other paragraphs is going to get lost. 

Overall, think about that initial GOAL of the project, and you can decide how you want your type to function to accomplish that goal.